
As a lifelong quilter, I’ve found that each project carries its own story, woven into the fabric just as much as the thread that binds them.
My journey to creating “Megan’s Star” began many moons ago, in a cozy, cluttered sewing room where my grandmother introduced me to the art of quilting.
Surrounded by stacks of fabric and the comforting hum of her sewing machine, I was mesmerized by the way simple pieces of fabric could transform into beautiful, intricate patterns.
This early exposure to quilting instilled in me not just a passion for crafting but also an appreciation for the stories each quilt could tell.
The inspiration for “Megan’s Star” blossomed from a desire to meld past with present. Wanting to incorporate my favorite pinky-coral fabrics and scraps from the Meadowsweet collection into a new project, I stumbled upon the concept of “made fabric.”
This approach, which involves sewing together small fabric pieces to create a new, unique textile, seemed the perfect way to honor the tradition of quilting while adding a touch of modern scrapiness.
Named after my niece Megan, this project represents a bridge between generations, a testament to the enduring charm of quilting.
A Star is Born: The Genesis of Megan’s Star
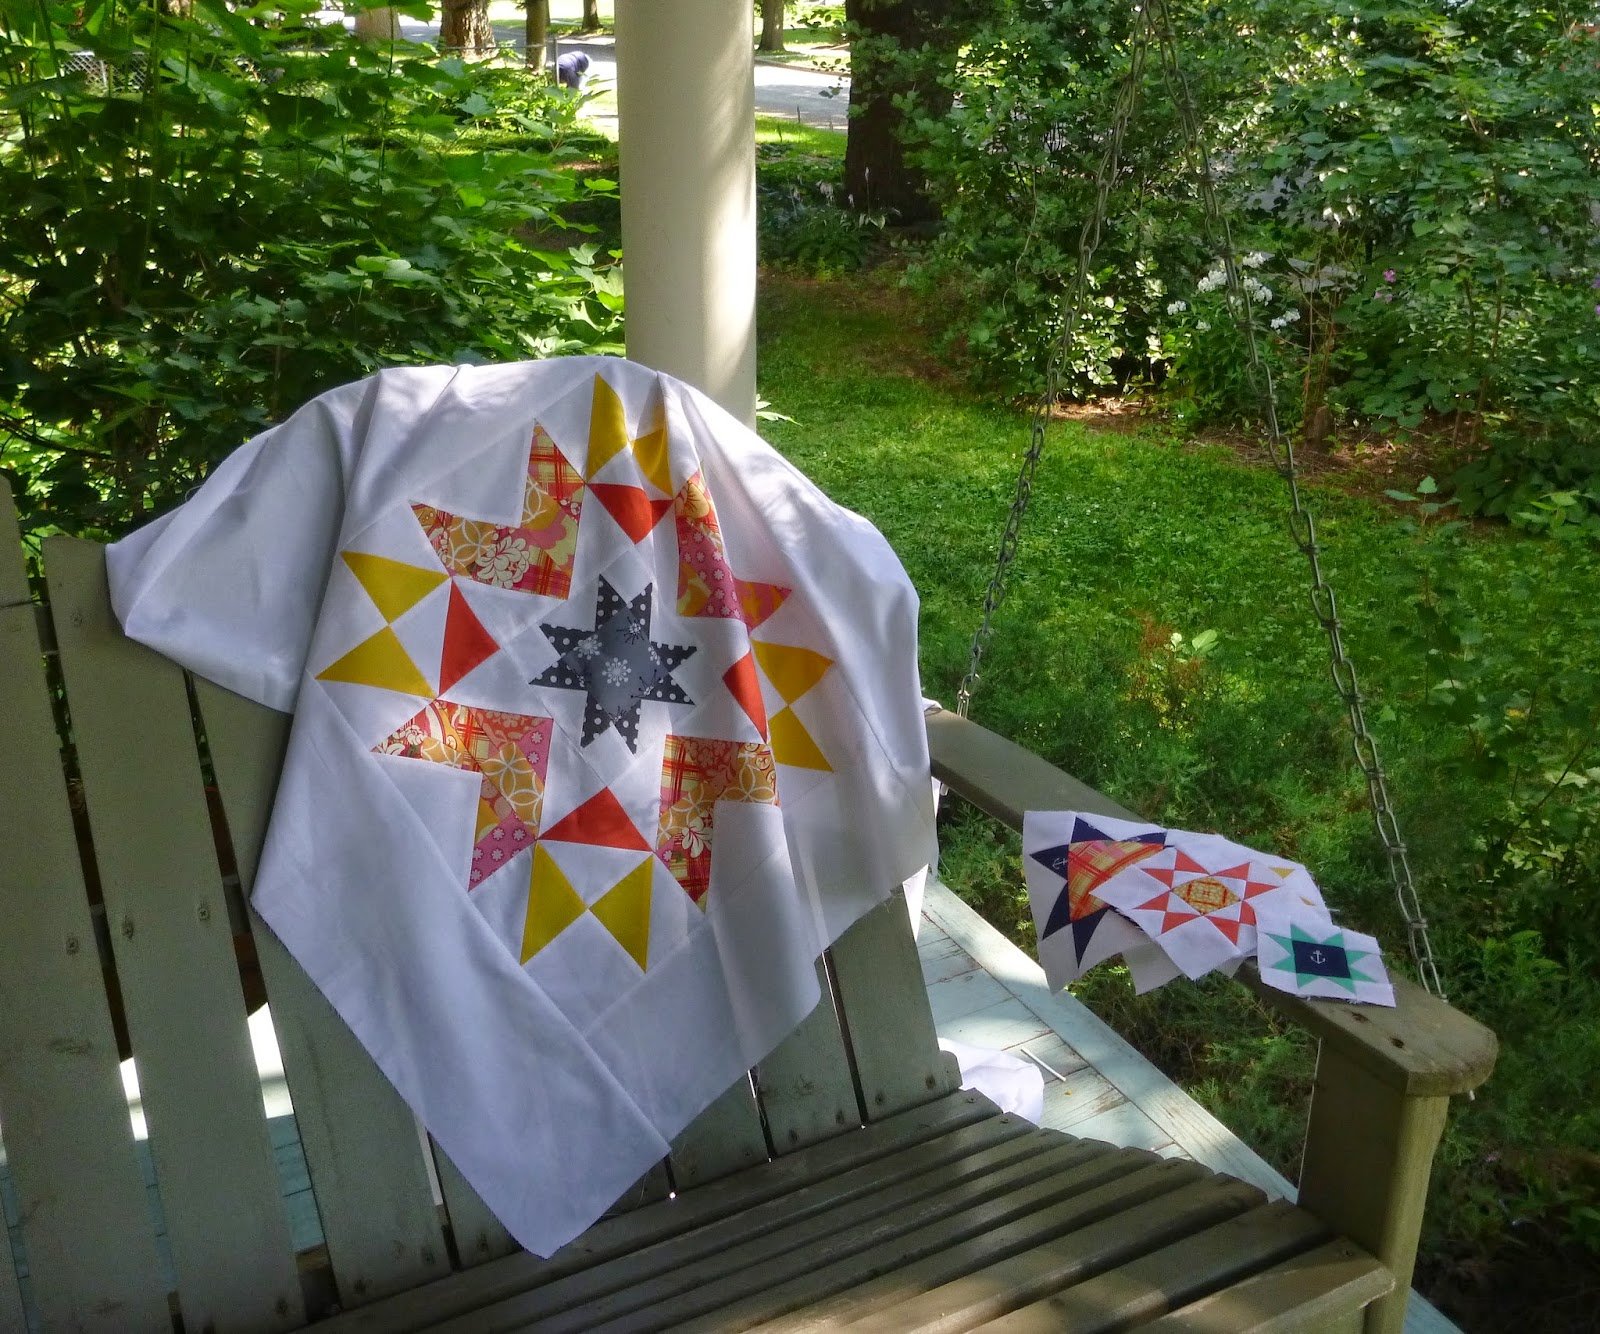
Creating “Megan’s Star” was an adventure in both design and sentiment. The star pattern itself is not merely a geometric arrangement of fabric but a canvas where my affection for my niece and my passion for quilting converge.
Tinkering with traditional star designs, I crafted a unique pattern that felt both fresh and familiar. This quilt block, jumbo-sized at 18 inches, was a journey back to my roots and a step into new quilting territories.
The use of “made fabric” for the side points of the star introduces a playful scrappiness, adding depth and texture to the overall design. This choice was a nod to the quilting tradition of making do with what you have, a principle my grandmother lived by.
The contrast between the scrappy side points and the solid fabrics used for the corner points and the rest of the star was intentional, creating a balance that reflects the quilt’s modern-traditional aesthetic. “Megan’s Star” is more than just a quilt block; it’s a celebration of creativity, family, and the endless possibilities that quilting offers.
Unraveling the Fabric: Materials and Preparation for Megan’s Star
Embarking on the journey to create “Megan’s Star” begins with gathering the necessary materials. This quilt block, with its blend of scrappiness and structure, requires a thoughtful selection of fabrics and tools. Here’s what you’ll need to bring “Megan’s Star” to life:
Materials Needed:
- Scrappy Fabric Panel: Start by making a panel from scraps. This unique element adds a touch of whimsy to the quilt. You’ll need enough to cut four 3 7/8″ squares and one 7.25″ square.
- White Fabric (Background): For the crisp backdrop that makes the colors pop, you’ll need:
- Four 3.5″ squares
- Six 4″ squares
- Four 3 7/8″ squares
- One 7.25″ square
- Four 2″ squares
- One 4.25″ square
- Yellow Solid Fabric: To add a splash of sunshine, gather four 4″ squares.
- Coral Solid Fabric: For a touch of warmth, prepare two 4″ squares.
- Dark Gray Fabric (Inner Star Points): Four 2 3/8″ squares will create contrast.
- Gray Fabric (Center of Inner Star): A single 3.5″ square brings the inner star together.
Full Pattern: Click Here
Setting the Stage for Creativity
Before diving into the construction of “Megan’s Star,” take a moment to reflect on the creative process. Quilting is not just about following steps; it’s about pouring a bit of yourself into each piece. As you prepare your materials, consider the interplay of colors and textures. How will the scrappy side points complement the solid fabrics? How can the placement of each piece tell a story? This preparatory phase is as much about envisioning the end result as it is about organizing your workspace.
Piecing Together Memories: The Craft of Quilting
With your materials at the ready, you’re poised to begin the tactile process of creating “Megan’s Star.” Remember, each cut and stitch is a step on the path to a finished piece that’s as unique as its creator. As you embark on this project, consider the legacy of quilting that you’re a part of. You’re not just making a quilt block; you’re weaving together a tapestry of memories, skills, and creativity that stretches back through generations.
Crafting Megan’s Star: A Step-by-Step Guide
Embarking on the creation of “Megan’s Star” is a journey that combines traditional techniques with personal creativity. Follow these detailed steps to bring your version of this vibrant quilt block to life.
Step 1: Create Your Scrappy Fabric Panel
- Sew Together Scraps: Begin by selecting small pieces of fabric that complement each other in color and pattern. Sew these scraps together, piece by piece, until you’ve formed a panel. Trim and sew more pieces as needed to achieve the desired size. Your goal is to create enough fabric to cut four 3 7/8″ squares and one 7.25″ square. Remember, the beauty of this step lies in its randomness and the unique texture it brings to the final piece.
Step 2: Cutting Your Fabric
- Prepare Your Pieces: With your scrappy panel ready, it’s time to cut the fabric according to the measurements provided in the materials section. Precision is key in this step to ensure that all elements of the block fit together seamlessly.
Step 3: Half Square Triangles (HSTs)
- Formation of HSTs: Draw a diagonal line from corner to corner on each of the 4″ white squares. Place these squares right sides together with the coral and yellow squares, sewing a 1/4″ seam on either side of the drawn line. Cut along the line, press the seams, and trim the resulting squares to 3.5″. This process will yield eight yellow HSTs and four coral HSTs.
Step 4: Flying Geese Units
- Assemble Flying Geese: Utilize the scrappy and white fabrics to create flying geese units. This involves drawing diagonal lines on the smaller squares, placing them on the corners of the larger squares, sewing, cutting, and pressing as directed. The magic of this step lies in seeing how these geometric shapes start to suggest the star’s points.
Step 5: Constructing Sub-units
- Building Block Foundations: Now, take the HSTs, flying geese, and remaining squares to start forming the sub-units of the quilt block. This is where the star begins to take shape, with each unit contributing to the overall pattern.
Step 6: Assemble Megan’s Star
- Bringing It All Together: Lay out all the sub-units according to the design of “Megan’s Star.” Carefully sew the units together, paying close attention to the alignment of seams and points. This final assembly is both exciting and challenging, as it reveals the culmination of your effort and creativity.
Additional Tips for Success
- Precision is Paramount: Take your time with cutting and sewing, ensuring accuracy in every step.
- Pressing Matters: Properly pressing your pieces can make a significant difference in the final appearance of your quilt block. Use steam or a dry iron as preferred to achieve crisp seams.
- Embrace Imperfections: While striving for accuracy, remember that slight imperfections add character to your quilt block. Quilting is, after all, a handmade craft.
Conclusion: Reflecting on Your Creation
As you hold the completed “Megan’s Star” in your hands, take a moment to appreciate the journey you’ve undertaken. From selecting fabrics to piecing together each element, you’ve not only created a beautiful quilt block but also participated in a timeless tradition of craftsmanship and creativity. Let “Megan’s Star” be a reminder of your quilting journey, a blend of patience, skill, and personal expression.
Whether you choose to incorporate this block into a larger quilt or display it as a standalone piece, “Megan’s Star” symbolizes the love and dedication inherent in the art of quilting. Share your creation with others, and may it inspire them to start their own quilting adventure.