
A Stitch in Time: The Art of “Tis the Season”
Quilting has always been more than just a craft; it’s a way to weave together memories, celebrate traditions, and add a personal touch to the holiday season. The “Tis the Season” table runner and placemats project is my way of bringing a piece of history into the present.
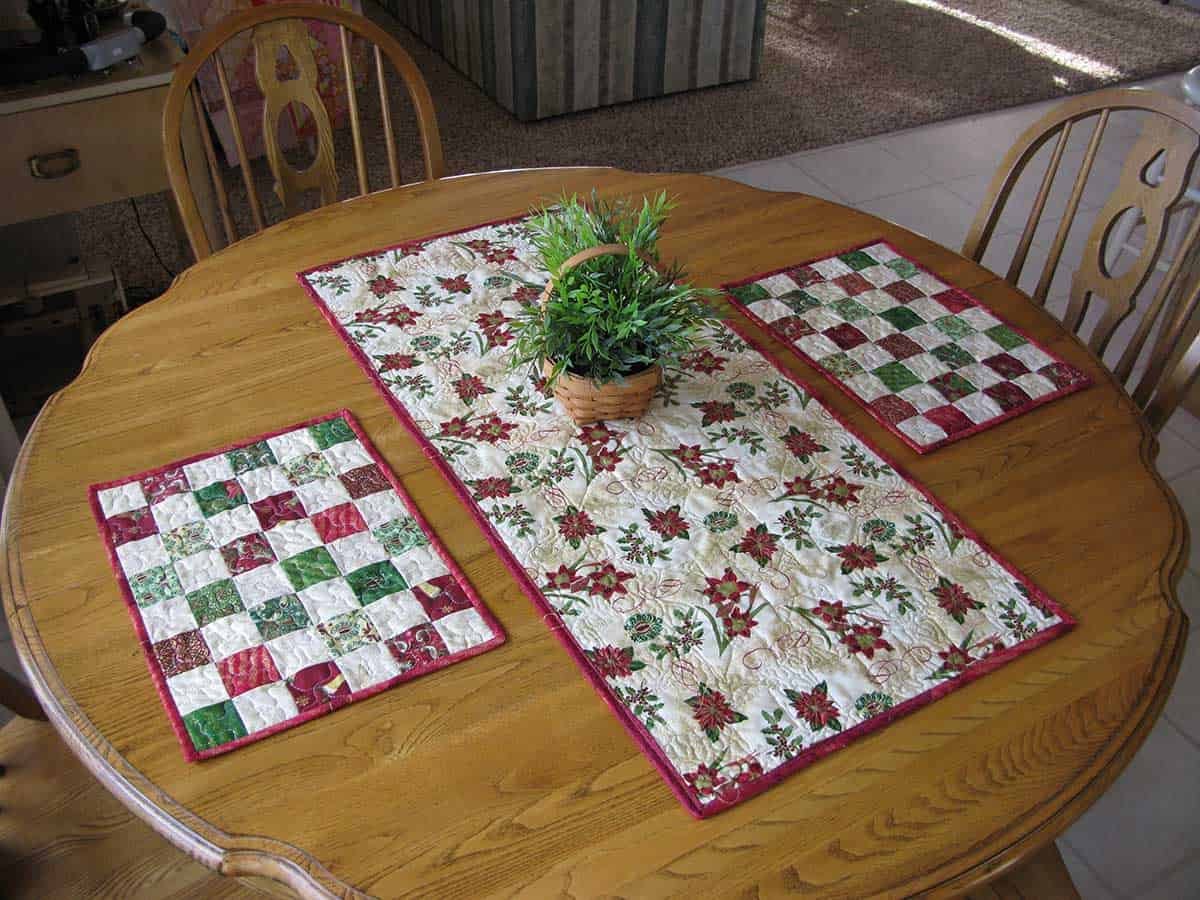
Using a beautiful array of Christmas fabrics, I aim to create a holiday centerpiece that’s not only decorative but also reversible, thanks to the floral print on the back. This versatility means the table runner and placemats can match a variety of holiday decors, making them perfect for festive celebrations.
Every holiday season, I find myself reflecting on the warmth and joy that fills our home, and much of that feeling is brought to life through the decorations we choose to display. One of my fondest memories involves the holiday quilts my grandmother used to make, each stitch carrying a story, a piece of our family history.
This year, I decided to honor that tradition by creating a quilted holiday table runner, a project that blends the nostalgia of my grandmother’s quilts with my personal touch.
Gathering the Threads: Materials You’ll Need for “Tis the Season”
Before we dive into the stitching and piecing, let’s ensure we have all the materials ready. Here’s what you’ll need to bring this holiday project to life:
- Fabrics:
- ¼ yard of dark red
- ¼ yard of dark red print
- ¼ yard of dark green
- ¼ yard of dark green print
- 1 yard of cream
- Scraps of 4 or 5 other coordinating fabrics, at least 3 inches wide, for the border
- 1 yard of fabric for binding
- 1½ yards of Christmas print for backing
- Batting suitable for a table runner and placemats
- Tools: Sewing machine, rotary cutter, cutting mat, and quilting ruler
Preparing Your Palette: Insights Before You Start
Quilting is not just about assembling pieces; it’s about painting with fabrics. The choice of dark reds and greens against the cream background is designed to evoke the rich, cozy feelings of the holiday season, while the additional scraps for the border allow for a personal touch, making each runner and placemat uniquely yours.
Before you start cutting and sewing in Tis the Season, take a moment to envision the finished product on your holiday table. Think about the orientation of the prints, especially if they’re directional, to ensure they align with your vision. Additionally, pressing your fabrics before cutting can lead to more accurate piecing, setting the foundation for a beautiful quilted project.
Full Pattern: Click Here
Step-by-Step Instructions
1. Creating the Quilt Blocks
- Begin with the three 10-inch blocks for the table runner. For the red blocks, cut your fabrics as follows: 5 squares of 3-inch green, 32 squares of 1¾-inch cream, and various pieces in dark and light red as outlined. Repeat a similar process for the green block, substituting the red pieces with green.
- Start with the 3-inch blocks (A), adding the 1¾-inch cream corners (B). Sew diagonally across each square, trim, and press to create a neat corner.
- Assemble each block by following the pattern, adding pieces to the center blocks and then building outwards, ensuring the corners and sides are pieced correctly according to the diagrams.
2. Assembling the Table Runner
- Sew the blocks together with the cream border pieces in between, creating the core of the runner.
- For the next border, alternate between the cream squares and assorted prints, arranging them to create a festive frame around the center blocks.
- Finish with the final border, attaching the 1½-inch strips to frame the entire runner.
3. Quilting and Binding
- Layer your table runner with batting and the backing fabric, then quilt as desired. This could be simple straight-line quilting or something more decorative.
- For the binding, cut 3 strips of 2½-inch fabric and bind the edges of the runner, securing all layers together.
Tis the Season: Creating the Placemats
- Follow a similar pattern to the table runner for the placemats, but adjust the block size and quantity to fit the smaller dimensions.
- Assemble the quilt top, then layer with batting and backing. Quilt as desired.
- Bind the placemats using 2½-inch strips, just as you did with the runner.
Additional Tips for “Tis the Season”
- Accuracy is Key: Take your time with cutting and piecing to ensure your blocks come together neatly.
- Quilting: Choose a quilting pattern that complements the design. Simple quilting can often enhance the beauty of the fabric and design.
- Binding: For a clean finish, make sure to fold the binding over the edges neatly and hand-stitch the final seam for a seamless look.
As you lay out your “Tis the Season” quilt table runner and placemats, reflect on the journey of creating something truly special for your home. Each stitch, each piece of fabric, has contributed to a masterpiece that not only enhances your holiday decor but also carries the warmth and love of handmade tradition.
This “Tis the Season” quilt project is more than just a festive decoration; it’s a celebration of craft, tradition, and the holiday spirit. Enjoy the beauty it adds to your holiday gatherings, and may it inspire you to continue creating and cherishing these moments of joy.
As you prepare for your holiday gatherings, don’t forget to bring out the “Tis the Season” quilt table runner and placemats. These “Tis the Season” quilt pieces of handcrafted art not only add a festive touch to your decor but also serve as a reminder of the love and care you put into creating them.
Whether it’s a family dinner or a gathering of friends, the “Tis the Season” quilt table runner and placemats will be a centerpiece of admiration. Let them spark conversations and bring smiles to your guests’ faces as they appreciate the craftsmanship and the holiday spirit they embody.