
There’s something magical about returning to the place where you grew up, especially when it’s as vibrant and lush as Portland, Oregon.
Though my life has taken me across the country to North Carolina, my heart never truly left the Pacific Northwest.
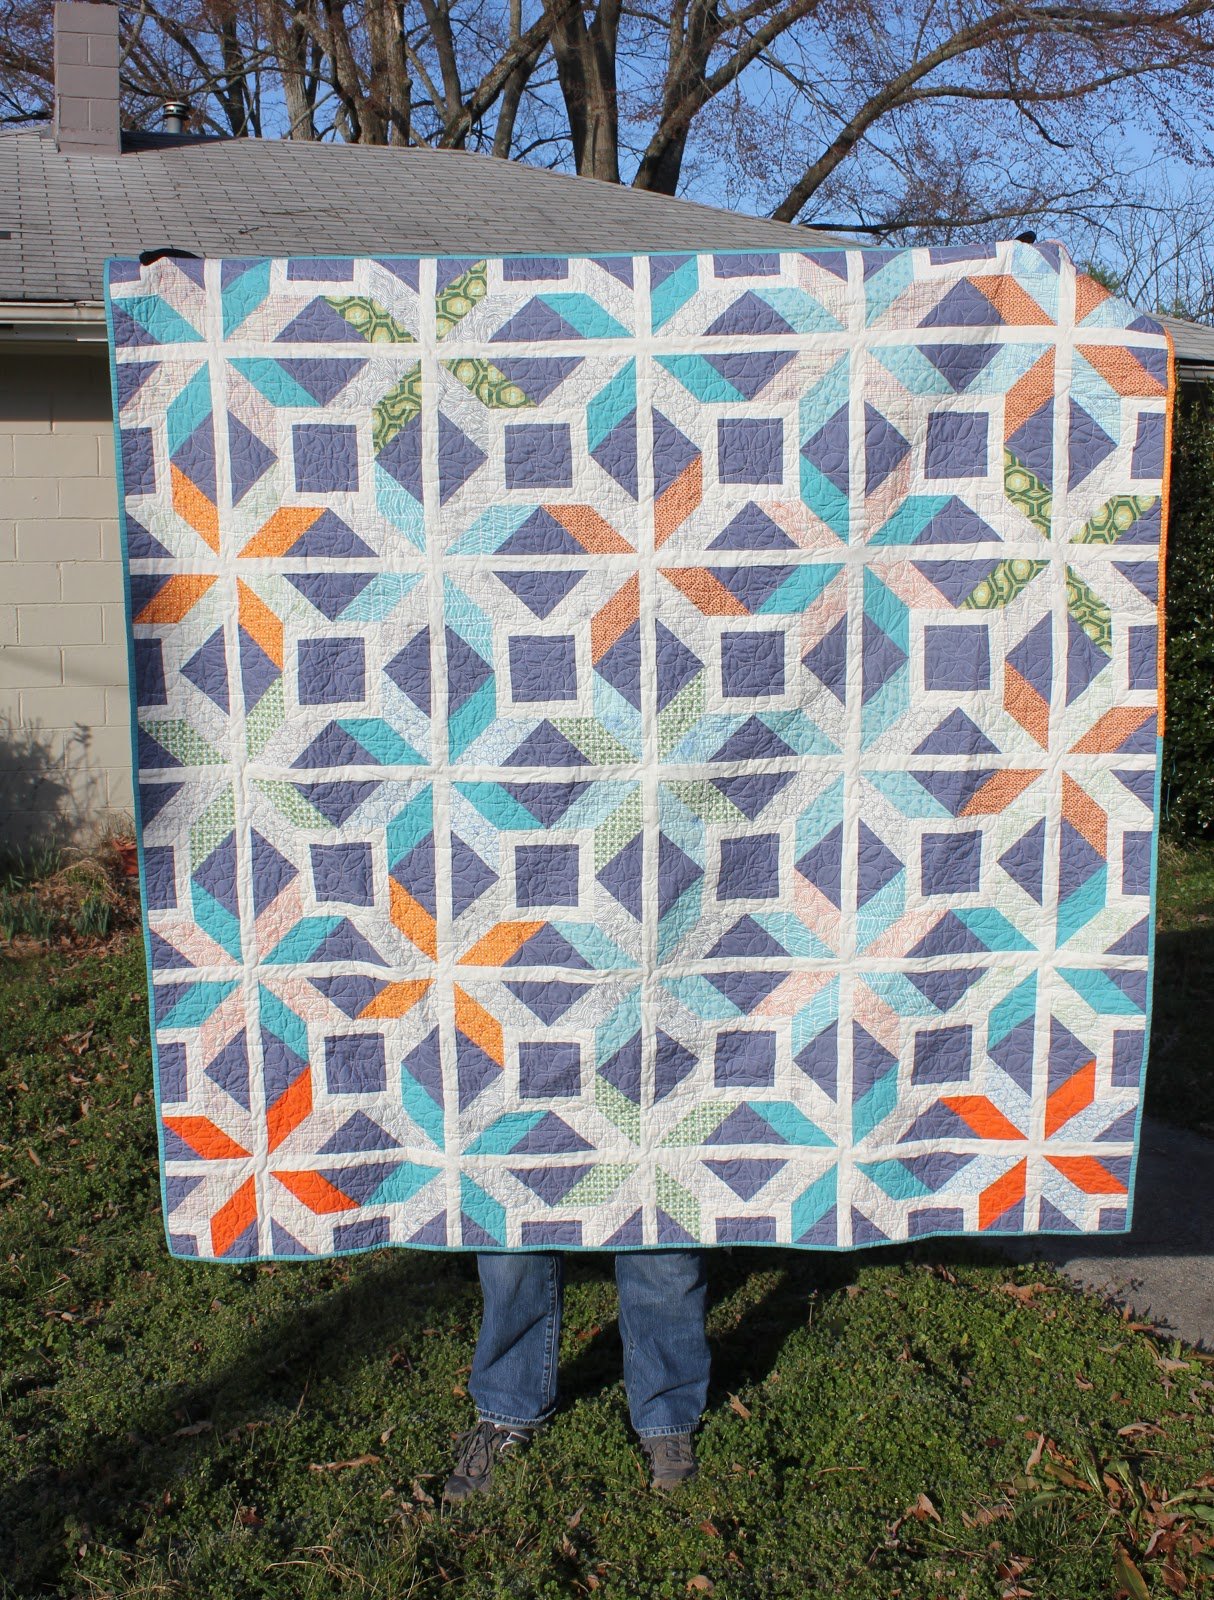
I recently found myself back in Portland, soaking in the memories of my childhood and reconnecting with the familiar sights and sounds. It was during this trip, while surrounded by the comfort of home, that I felt inspired to revisit and share a special quilting project—one that’s close to my heart: the Stars Align block.
This block, like Portland itself, is a blend of simplicity and charm. It might look intricate, but don’t let its appearance fool you—this block is as straightforward as it gets. No fancy tools, no complicated techniques—just a love for quilting and a desire to create something beautiful. Whether you’re a quilting pro or a beginner, this tutorial will guide you through each step, making the process as enjoyable as it is rewarding.
Nordic Inspiration: The Origins of the Stars Align Block
The Stars Align block was born out of a deep admiration for the intricate patterns found in Nordic sweaters. Their geometric designs and clean lines are both timeless and captivating. While sketching out ideas for a new quilt, I found myself drawn to these traditional motifs.
This block, with its star-like design, is my interpretation of those classic patterns, adapted for fabric rather than wool. It’s a perfect project for anyone looking to infuse a bit of Nordic charm into their quilting.
Materials: Everything You Need for the Stars Align Block
Before we get started, let’s gather the materials. Here’s what you’ll need to create one Stars Align block:
For the Half-Square Triangle (HST) Blocks:
- 4 squares, 4″ x 4″, of background fabric.
- 4 squares, 4″ x 4″, of star color A.
- 4 squares, 4″ x 4″, of star color B (For the stars, I like to combine one low-volume fabric with one that’s more vibrant).
For the Corner Blocks:
- 4 squares, 2.5″ x 2.5″, of background fabric.
- 1 strip of white fabric, approximately 28″ x 1.5″ (choose a fabric that contrasts nicely with the other fabrics).
For the Lattice Lines:
- 1 strip of white fabric, approximately 14.5″ x 1.5″, for the vertical lattice.
- 1 strip of white fabric, approximately 15.5″ x 1.5″, for the horizontal lattice.
Tools:
- Rotary cutter and cutting mat.
- Ruler.
- Scissors.
- Water or heat-soluble marker.
- Sewing machine with a quarter-inch foot.
- Iron for pressing seams.
Getting Ready: Tips Before You Begin
Before you start cutting and sewing, take a moment to set up your workspace. Make sure you have all your materials and tools within easy reach. Cutting your fabric with precision is key to making sure your blocks line up perfectly, so take your time with each measurement.
If you’re using a mix of low-volume and vibrant fabrics, lay them out beforehand to see how they work together. This will help you ensure that the star pattern will stand out beautifully against the background.
Full Pattern: Click Here
Step-by-Step Instructions: Crafting the Stars Align Block
Now that you’ve got everything ready, it’s time to start creating your Stars Align block. Follow these steps closely, and soon you’ll have a stunning quilt block that’s ready to be admired.
Step 1: Make the Half-Square Triangle (HST) Blocks
- Pair the Squares: Begin by pairing the squares as follows:
- 2 squares of star color A with 2 squares of star color B.
- 2 squares of star color A with 2 squares of background fabric.
- 2 squares of star color B with 2 squares of background fabric.
- Mark the Diagonals: On one square of each pair, use your water or heat-soluble marker to draw a diagonal line from one corner to the opposite corner.
- Sew the Pairs: Sew a quarter-inch seam on both sides of the marked diagonal line for each pair. Chain-piecing (sewing one pair after another without cutting the thread) will speed up this process.
- Cut and Press: Cut along the marked diagonal line to create two triangles from each square. Press the seams open to keep the block flat.
- Trim the HSTs: Trim each HST down to 3.5″ x 3.5″ using your ruler and rotary cutter. These blocks will form the star points in the final design.
Step 2: Create the Corner Blocks
- Prepare the Strips: Line up the 2.5″ x 2.5″ squares of background fabric along the 28″ strip of white fabric, leaving small gaps between each square.
- Sew and Press: Sew the squares onto the strip, then press the seams open.
- Cut and Re-Sew: Cut the strip into segments so that each block is 2.5″ wide by 3.5″ tall. Line these segments up along the remaining white strip, sew them together, and press the seams open again. Each block should now measure 3.5″ x 3.5″.
Step 3: Assemble the Block
- Layout the Blocks: Lay out all 16 blocks according to the pattern to see how they fit together. This step helps ensure that everything is in the right place before sewing.
- Sew the Blocks into Pairs: Begin by sewing the blocks into pairs, ensuring that the seams line up perfectly. Use pins to keep everything in place if needed. Press the seams open after sewing.
- Join the Pairs: Next, sew the pairs together to form four larger blocks. Again, press the seams open.
- Add the Lattice Lines: Sew the upper and lower sets of blocks together, inserting the 14.5″ x 1.5″ white strip between them to create the vertical lattice. Trim the block and press the seams open.
- Complete the Block: Finally, sew the upper and lower halves together, adding the 15.5″ x 1.5″ strip for the horizontal lattice. Make sure to align the vertical seams above and below the white strips. Press the seams open and trim any excess fabric from the edges.
Your Stars Align block is now complete! It should measure 13.5″ x 13.5″.
Additional Tips: Perfecting Your Stars Align Block
- Precision is Key: Accurate cutting and sewing will ensure that your block comes together perfectly. Take your time with each step to avoid any misalignment.
- Experiment with Fabrics: Don’t hesitate to play with different fabric combinations. The contrast between low-volume and noisy fabrics can create a dynamic and eye-catching star pattern.
- Press as You Go: Pressing seams open throughout the process will help your block lay flat and make it easier to sew the final seams.
- Use Pins: When joining blocks, use pins to ensure that the seams line up correctly. This will give your block a polished and professional finish.
As you finish your Stars Align block, take a moment to appreciate the work you’ve put into each stitch. This block is more than just a piece of fabric—it’s a testament to your creativity and dedication.
Whether you’re making a single block or a whole quilt, this project is a beautiful way to bring Nordic-inspired charm into your home. And don’t forget, quilting is as much about the journey as it is about the final product. Enjoy every moment, from cutting the first square to pressing the final seam.