
From a young age, I, Julie, was enchanted by the colorful tapestries that adorned the walls and furniture of my grandmother’s home. Each quilt she crafted told a story, a patchwork of history and love that she stitched into every square. One of my fondest memories was sitting beside her, threading needles and sorting through scraps of fabric that would soon become part of a new legacy.
Today, I share a project close to my heart, the Edinburgh Square baby quilt, a pattern that embodies both simplicity and joy, perfect for beginners and seasoned quilters alike. This nostalgic reverence for quilting has stayed with me into adulthood, driving me to create pieces that not only warm the body but also the soul.
The Charm of Edinburgh Square
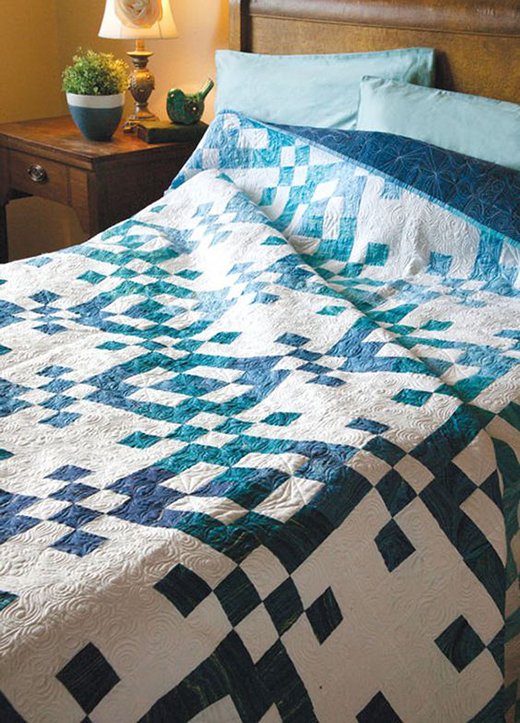
The Edinburgh Square quilt pattern is more than just a design; it’s a fresh take on traditional quilting that brightens any room with its vibrant colors and dynamic layout. This particular quilt, designed by Rachel Hayes, uses strip piecing—a technique that speeds up the quilting process without sacrificing beauty.
The choice of bright prints paired with solid whites encapsulates a modern yet playful aesthetic, ideal for a baby’s nursery. The design’s simplicity allows each quilter to inject their personality, making each Edinburgh Square quilt uniquely heartfelt.
A Canvas of Color and Comfort
At the heart of the Edinburgh Square quilt’s appeal is its versatility and the ease with which it can be customized. The design utilizes a straightforward approach by incorporating strip piecing, making it accessible for quilters of all skill levels. This method not only expedites the construction process but also allows for the playful mixing of colors and patterns. Each 12″ x 12″ block features a dynamic contrast between the chosen prints and the crisp white background, giving the quilt a vibrant, eye-catching look.
Gathering the Essentials
Before diving into the quilting process, it’s crucial to have all your materials ready. Here’s what you’ll need for the Edinburgh Square baby quilt:
- Bright Printed Fabrics: 2 1/2 yards total, to create a lively and colorful effect.
- White Solid Fabric: 2 1/2 yards, providing a sharp contrast that makes the colors pop.
- Lime Solid Fabric: 1/4 yard for the binding, adding a fresh, zesty edge to the quilt.
- Backing Fabric: 3 3/4 yards, to comfortably cover the back of your quilt.
- Batting: A 52″ x 52″ piece, to give your quilt warmth and thickness.
- Cutting Tools: A rotary cutter, mat, and a clear ruler for precise cuts.
- Sewing Machine & Supplies: Thread, pins, and scissors tailored for fabric use.
- Iron and Ironing Board: For pressing fabrics and completed blocks.
Ready, Set, Sew!
Preparing to create your Edinburgh Square quilt involves not just gathering materials but also setting up a comfortable workspace. Ensure your sewing area is well-lit and organized, with all tools within easy reach. This setup helps in maintaining accuracy and enjoyment throughout the quilting process. Additionally, consider pre-washing your fabrics to prevent any color bleeding after the quilt is made, especially if you’re using highly saturated prints.
Step-by-Step Instructions: Creating Your Edinburgh Square Quilt
Embarking on your Edinburgh Square quilt begins with precise cutting and organized assembly. Here’s how to bring your baby quilt to life, one square at a time.
Full Pattern: Click Here
Step 1: Cutting Your Fabrics
- Start by cutting the bright prints and white solid fabrics into strips:
- For the bright prints, cut 16 sets of one 2 1/2″ x 22″ strip and one 2 1/2″ x 20″ strip.
- For the white fabric, cut 16 strips each of 2 1/2″ x 22″ and 2 1/2″ x 20″, and 32 rectangles measuring 2 1/2″ x 4 1/2″.
- From the lime solid fabric, cut 6 strips of 2 1/2″ for the binding.
Step 2: Sewing the Strip Sets
- Sew a 22″ bright print strip to a 22″ white strip to form a strip set. Press the seams towards the darker fabric to reduce visibility. Repeat this to make 16 sets. Cut each completed strip set into eight 2 1/2″ segments.
- Repeat the process with the 20″ strips and then cut them into four 4 1/2″ segments per set.
Step 3: Assembling the Blocks
- Pair two 2 1/2″ segments to form a four-patch unit. You will need three matching four-patch units per block.
- Sew together one bright print 2 1/2″ segment with a white solid 2 1/2″ x 4 1/2″ rectangle to create a corner unit. Make two matching corner units per block.
Step 4: Constructing the Edinburgh Square Block
- Arrange three four-patch units, four 4 1/2″ segments, and two corner units according to Diagram IV.
- Sew these components into three rows, then stitch the rows together to complete one Edinburgh Square block. Repeat to make a total of 16 blocks.
Step 5: Completing the Quilt Top
- Lay out the blocks in four rows of four blocks each, paying attention to the orientation for a consistent pattern.
- Sew the blocks together within each row, then sew the rows together.
Step 6: Finishing Touches
- Layer your quilt top with the batting and backing, and baste them together to prepare for quilting.
- Quilt as desired. Rachel machine quilted an allover floral motif for a soft, comforting texture.
- Bind the quilt using the lime solid strips to frame your creation beautifully.
Additional Tips
To enhance your quilting experience and ensure a flawless finish:
- Always press your seams as you work. This step helps in aligning pieces accurately and ensures your quilt top lies flat.
- Check the alignment of each block by laying it out before sewing them together, adjusting as needed to maintain a consistent look across the quilt.
Creating the Edinburgh Square baby quilt is not just about crafting a warm blanket; it’s about stitching together moments of joy and splashes of color that will brighten any room. As you finish your quilt, take a moment to appreciate the craftsmanship and love woven into each square. This quilt, with its lively patterns and soft fabric, is sure to be cherished for years to come, just like the stories embedded in the quilts of my grandmother.