
Quilting is an intricate craft that requires patience, precision, and attention to detail. One of the key lessons I’ve learned in my quilting journey is the importance of accuracy in every step, from cutting fabric to sewing seams. The Mayflowers Quilt, with its complex layout and precise measurements, is the perfect opportunity to refine these skills and create a stunning work of art. Every seam, every block, and every stitch brings you closer to a masterpiece that reflects your dedication.
The instructions for the Mayflowers Quilt emphasize the importance of a scant quarter-inch seam allowance and stress careful cutting and piecing. Whether you’re an experienced quilter or an ambitious intermediate, this guide will help you navigate the complexities of the pattern and ensure that your final product is both accurate and beautiful.
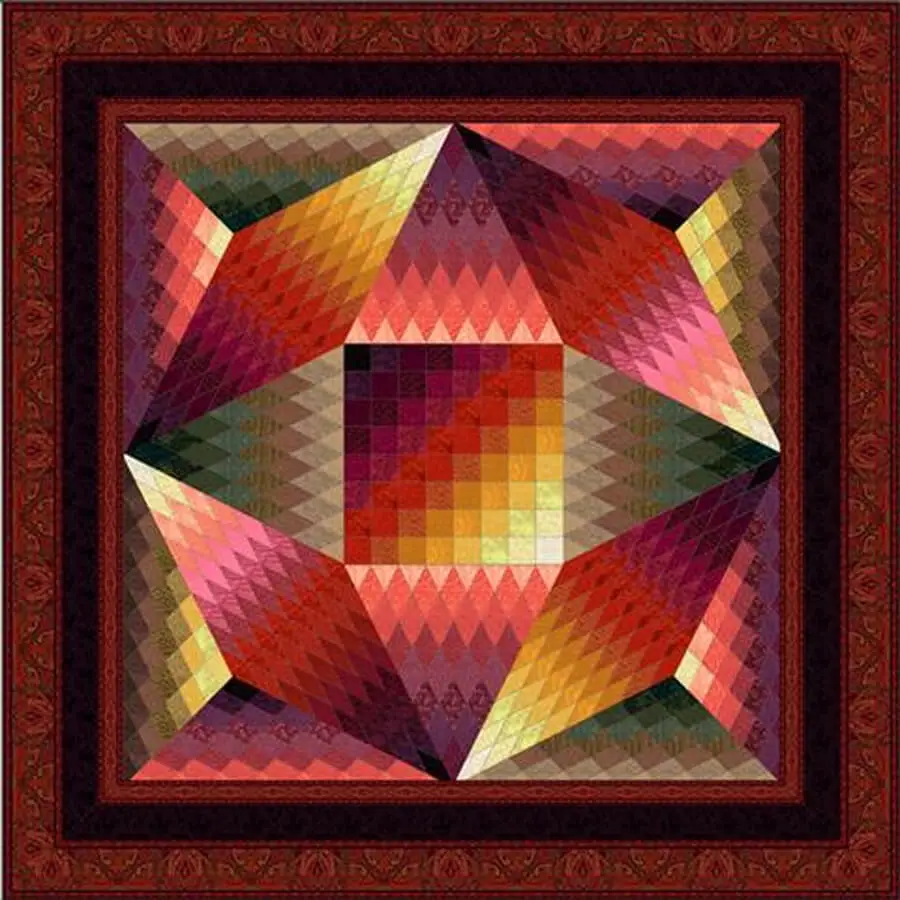
Crafting with Precision: The Importance of Accurate Seams and Templates in the Mayflowers Quilt
This quilt is divided into several sections, each requiring precise measurements and careful cutting. Using templates for accuracy is a vital part of the process, and the beauty of the Mayflowers Quilt relies heavily on the exactness of your work. From cutting crosswise grain strips to creating perfect diamonds and triangles, your focus on precision will ensure the finished quilt maintains its clean lines and vibrant shapes. With clear guidance and the right tools, you’ll be able to approach each section with confidence and produce a quilt that’s as rewarding as it is beautiful.
Materials and Tools for Success with the Mayflowers Quilt
Before you begin, gather all the necessary materials and tools for your Mayflowers Quilt. Here’s what you’ll need for this project:
Fabric:
- Various fabrics as listed in each section of the pattern.
- 1½ yards of muslin for blocking guides.
Tools:
- Sewing machine with a setting for a scant quarter-inch seam allowance.
- Rotary cutter and acrylic rulers (recommended sizes: 6″ x 24″, 6″ square, 12″-15″ square).
- Fine metal or glass head pins for precision (avoid plastic pins as they may melt under heat).
- Felt wall or foam core board (24″ x 36″) for fabric placement.
- Iron (without steam) and a pressing surface for accurate pressing without distortion.
- Masking tape, fine-tipped chalk pencil, mechanical pencil, and permanent marker.
- Double-sided clear tape for securing templates.
Cutting and Organizing: Preparing Your Fabrics for the Mayflowers Quilt
Each section of the Mayflowers Quilt involves different fabric cuts, which need to be handled with care to avoid stretching or distorting the fabric. Begin by carefully cutting all your fabric strips, following the specific dimensions listed under each section. Keep in mind that all cutting measurements include a ¼” seam allowance.
Additionally, using templates will be key to achieving precision in the Mayflowers Quilt. For Templates 2-6, create accurate paper templates and tape them to the underside of a ruler for easy fabric cutting. This method will help you maintain exact edges and ensure your fabric pieces are perfectly aligned when sewing.
Full Pattern: Click Here
Step-by-Step Instructions for Assembling the Mayflowers Quilt
Now that your materials are ready, it’s time to bring the Mayflowers Quilt to life. Follow these detailed steps for each section to ensure every piece comes together with precision.
Step 1: Creating the Center Section of the Mayflowers Quilt
The center of the Mayflowers Quilt starts with a grid of 3″ x 3″ squares. Follow the color guide to arrange the squares on your felt-covered foam core board:
- Pick up the fabric for Column 2, Row 1 (C2/R1) and place it right sides together (RST) with the fabric in C1/R1.
- Stitch the seam and leave the section under the machine’s foot while you continue adding squares from the next row.
- Once all squares are sewn together, press the seams in Row 1 toward the darkest fabric, and in Row 2, press toward the lightest fabric. Continue alternating seam directions for each row.
- Sew the rows together, matching seams for perfect alignment, ensuring the center of your Mayflowers Quilt is accurate and clean.
Step 2: Constructing the Top and Bottom Triangles (Sections 2A and 2B)
Using Template 2 and Template 3, cut the required number of diamonds and triangles from the specified fabrics. Refer to the color guide and arrange the pieces on your felt board:
- Pin the diamonds to the triangles with right sides together.
- Sew along the edge, carefully finger pressing the seams open. Continue until you have completed all the required sections for the top and bottom triangles of the Mayflowers Quilt.
Repeat this process for the side triangles in Sections 3A and 3B, ensuring the placement and sewing align with the pattern.
Step 3: Assembling the Diamond and Triangle Sections (Sections 4A, 4B, 5A, and 5B)
The next sections of the Mayflowers Quilt involve smaller diamonds cut using Template 4:
- Lay out your fabrics on the felt board, following the layout diagram for proper placement.
- Pin and sew diamonds into rows, pressing the seams open for accuracy.
- Use a blocking guide for these sections to ensure all edges align perfectly, keeping the diamonds sharp and clean.
Step 4: Completing Large Triangles (Sections 6A, 6B, 8A, 8B)
For these sections, use Templates 5 and 6 to cut diamonds and sew them together into larger triangles. Follow the same method as before, using careful pinning and sewing to ensure that all pieces fit precisely into the Mayflowers Quilt design.
Step 5: Adding the Borders to the Mayflowers Quilt
Once the center and surrounding sections are complete, it’s time to add the borders to your Mayflowers Quilt. Borders in this quilt are critical for maintaining its overall symmetry and design, so pay close attention to the cutting and placement instructions:
- Cut the inner border strips 3⅛” x 76″ from the Symphony Border fabric.
- Align the motifs in the mirror-imaged sections before sewing. Press the folds and ensure symmetry in each border unit.
The second border should be cut 4″ x 85″ from the Claret Lava fabric. Fold and press as before, ensuring that all motifs are matched before sewing. The final outer border is cut 6¼” x 100″, completing the frame of your Mayflowers Quilt.
Tips for Success with the Mayflowers Quilt: Precision and Patience
- Accuracy in Seams: Throughout the entire project, use a scant quarter-inch seam allowance for precision. Test your machine settings before starting to ensure consistency.
- Pressing Matters: Press seams carefully without using steam, as it may stretch the fabric. Finger pressing helps to maintain accuracy before final pressing.
- Use Blocking Guides: For sections with bias edges, blocking guides ensure that your pieces don’t distort during assembly.
- Pinning Technique: Pin seams precisely, especially where multiple seams intersect. Leave pins in place until the last possible moment to avoid misalignment during sewing.
The Mayflowers Quilt is more than just fabric and stitches—it’s a testament to your skill and dedication as a quilter. By following these detailed steps and maintaining precision throughout the process, you’ll create a quilt that radiates both beauty and craftsmanship. Whether you choose bold colors or subtle tones, the final result will be a stunning piece that reflects your passion for quilting.
Take your time, enjoy the process, and remember that each step brings you closer to a masterpiece that you’ll treasure for years to come with the Mayflowers Quilt.