
My journey into the world of quilting has been marked by numerous projects, each with its own set of challenges and triumphs. Among these, the Hexagon Flower Quilt stands out as a memorable endeavor.
Inspired by the traditional Grandmother’s Garden quilt but with a modern twist, this project eliminated the need for countless spacers, keeping my interest alive and making the process enjoyable. Utilizing colorful Moda Mini Charm Packs and a simple yet effective layout, this quilt became a testament to both creativity and patience.
Last year, I embarked on creating a Hexagon Flower Quilt that not only challenged my quilting skills but also brought immense satisfaction once completed. Its assembly was straightforward yet time-consuming, a perfect blend of simplicity and dedication. Now, I’m excited to share this process with you, from the initial hexie stitching to the final assembly, hoping it will inspire you to create your own beautiful quilt.
Crafting Modern Memories: The Hexagon Flower Quilt
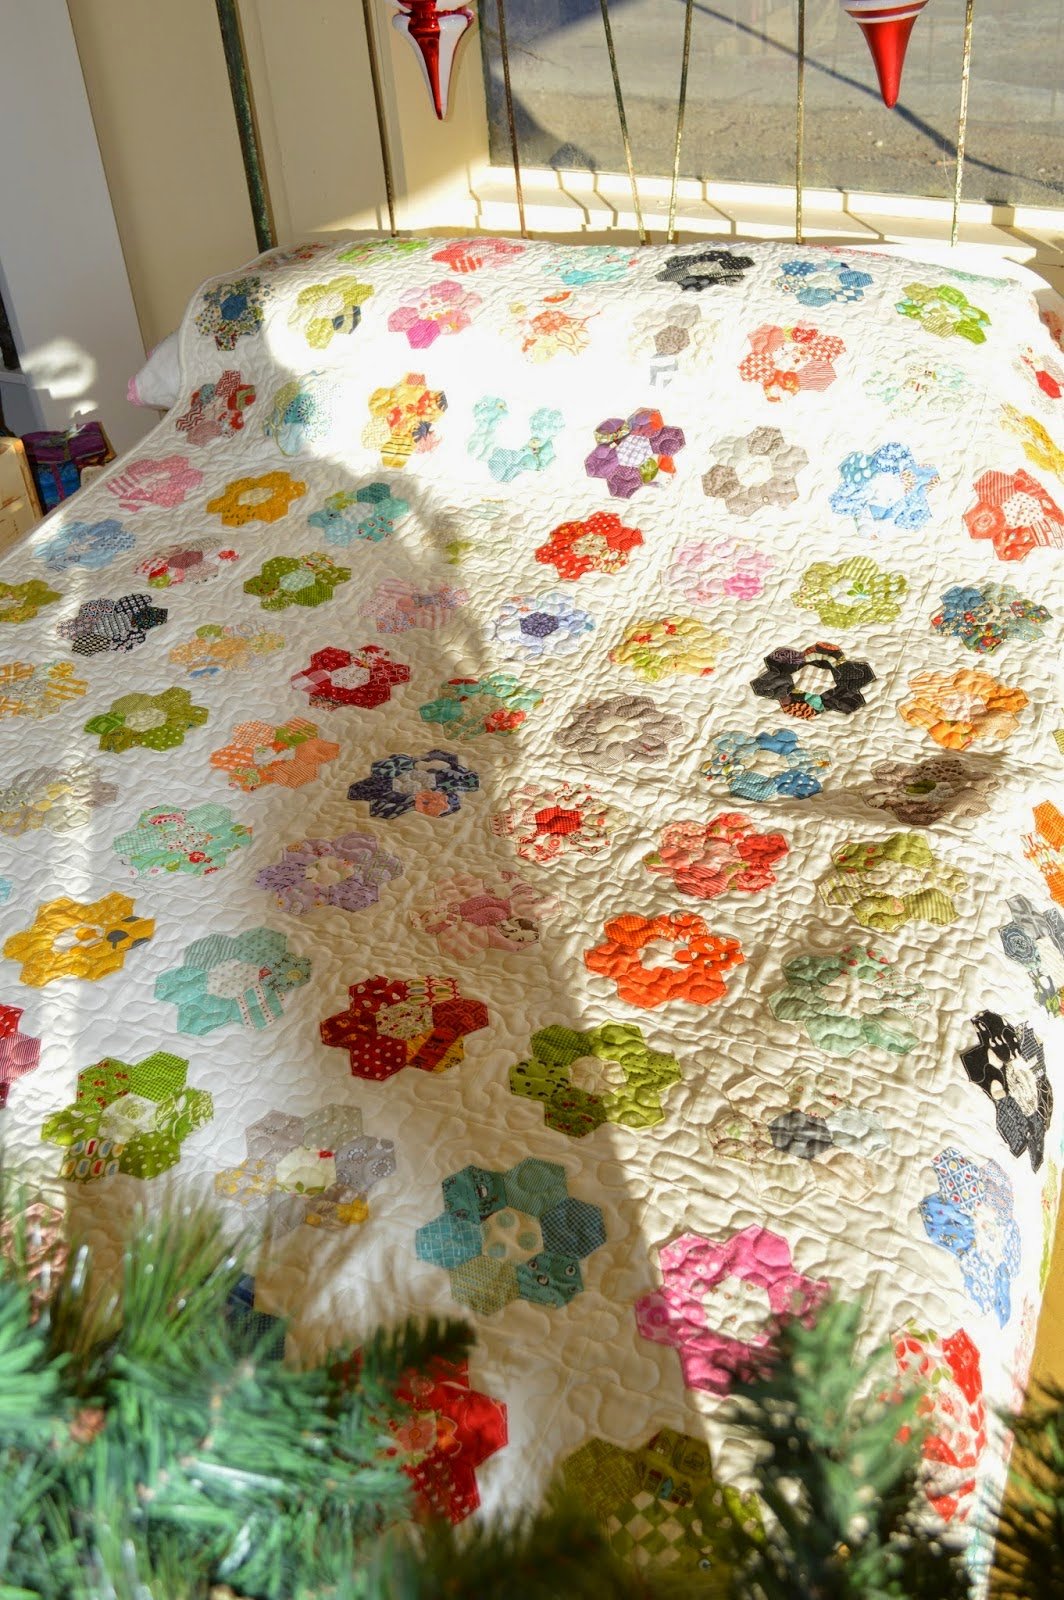
This quilt represents a modern take on the beloved Grandmother’s Garden design, integrating vibrant hexie flowers into a fresh layout. The absence of traditional spacers updates the classic pattern, making it more accessible and less tedious to assemble. The Hexagon Flower Quilt is not just a piece of bedding; it’s a canvas where each hexie flower adds to a larger story, a bloom in a modern garden of fabric.
Petals and Possibilities: Building Your Quilt Block by Block
Creating each hexie flower is an adventure in color and texture. The process involves selecting fabrics, forming the hexie petals, and piecing them together around a central hexie to form a flower. This section will explore the detailed steps to craft these charming blocks, offering tips to enhance your technique and efficiency.
Full Pattern: Click Here
Materials
To begin your Hexagon Flower Quilt, gather the following materials:
- Hexagon paper pieces: 300 pieces for 1-inch hexies.
- Fabric squares: 756 squares measuring 2.5″ each, suitable for the petals and centers.
- Background fabric: Approximately 3.5 yards for a twin-sized quilt.
- Thread: Choose a neutral color like off-white or light grey that can blend with multiple fabric colors.
- Sewing supplies: Needles, thread snips, and pins.
- Iron: For pressing your hexies flat after removing the papers.
Setting the Stage: Preparing Your Hexagon Flowers
Before assembling your quilt, it’s crucial to prepare and perfect your hexagon flowers. This preparation involves cutting and basting your fabric to the hexie papers, stitching the petals around a central hexie, and finally ironing the completed flowers flat. Tips on how to align and attach each flower to the background fabric will ensure your quilt top is as beautiful as it is precise.
Step-by-Step Instructions
Assembling your Hexagon Flower Quilt involves precision and patience, but the result is truly rewarding. Here’s how to bring the vibrant hexie flowers into a stunning quilt:
Step 1: Create Each Hexie Flower
- Start with the center of the flower: Take one 1-inch paper hexie and wrap it with a 2.5″ fabric square. Secure the fabric to the paper with basting stitches.
- Attach the petals: Sew six 2.5″ square-wrapped hexies around the center using a whip stitch, ensuring each petal’s right sides are facing each other as they are attached.
Step 2: Prepare the Background
- Cut your background fabric into 7″ squares. Each square will host one hexie flower.
- To center the flower, fold each background square in half twice, and finger press to create crosshairs.
Step 3: Positioning the Flower
- Place the completed hexie flower on the background square, aligning it with the crosshairs for precise placement.
- Pin the flower in place, making sure it is secure.
Step 4: Sewing the Flower to the Background
- Using a thread color that matches or complements the overall color scheme, sew around the edge of the hexie flower, close to the petals to attach it firmly to the background fabric.
Step 5: Assembling the Quilt Top
- Once all flowers are sewn onto their respective background squares, arrange the squares in a 9×12 block layout to form the quilt top.
- Sew the squares together, paying attention to the alignment of edges and corners to ensure a smooth, even quilt top.
Step 6: Completing the Quilt
- Layer the quilt top with batting and backing, then quilt as desired to enhance the texture and secure all layers.
- Finally, bind the edges of the quilt to give it a finished look.
Additional Tips
- Efficiency Tip: Consider stitching multiple hexies in batches if you prefer to work assembly-line style. This can save time and streamline the process.
- Creative Variations: Feel free to experiment with different color schemes or layouts. Each hexie flower can be unique, or you can create patterns through color repetition.
- Finishing Touches: For quilting, simple lines that echo the hexagonal shapes can highlight the quilt’s geometric design. Alternatively, more elaborate quilting can add depth and contrast to the simpler design of the hexie flowers.
Completing a Hexagon Flower Quilt is a journey of creativity and meticulous craftsmanship. Each step, from crafting individual hexie flowers to the final stitches of binding, contributes to creating a quilt that is not only beautiful but also infused with personal touch and artistic expression.
Whether you gift this quilt or keep it to adorn your own home, it stands as a testament to the love and care put into every stitch. Embrace the process, and you’ll find that each hexagon adds to a larger picture of quilting joy.