
Ever since my parents gifted me a sewing machine for Christmas in 2004, sewing has become a cherished pastime, a creative outlet that allows me to bring fabric to life in the most magical ways.
From fashioning clothing and cloth diapers to crafting quilts, each project offers its own unique joy. Yet, among the myriad of sewing projects I’ve undertaken, making a rag quilt holds a special place in my heart.
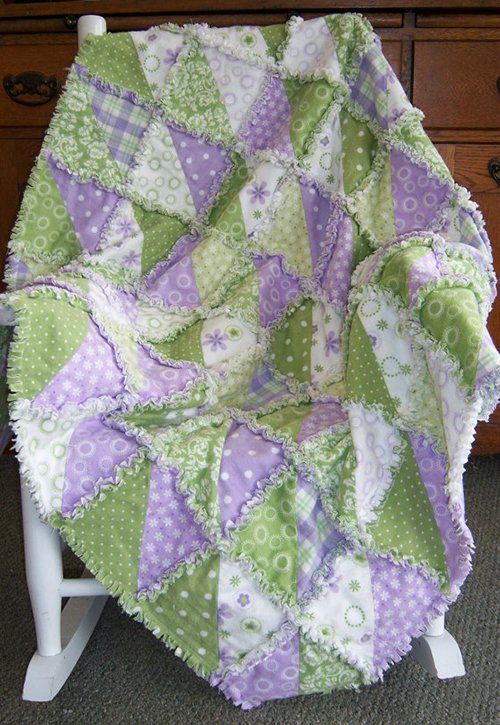
Quilting, in particular, resonates deeply with me, blending tradition and creativity in a tapestry of threads and fabrics. Rag quilts, with their cozy, frayed edges, stand out as both a favorite project and a meaningful gift.
The process of creating a rag quilt, which my mom and I have often done together, encapsulates the essence of warmth and love, making it a delightful venture from start to finish.
A Journey Through Layers: The Art of Rag Quilting
Rag quilting represents more than just a sewing project; it’s a journey through layers of fabric and memories, each piece telling its own story. The beauty of a rag quilt lies in its simplicity and the tactile experience of its frayed edges, inviting a deeper connection not only to the craft but to the moments and stories each quilt holds.
This type of quilting offers a wonderful entry point for beginners, requiring only basic sewing skills to create something truly beautiful and cherished.
Selecting the Perfect Fabrics
Choosing the right fabrics is a pivotal step in the journey of creating a rag quilt. For this specific project, I was drawn to the warmth and cheer of a Christmas/winter-themed fabric. This choice not only set the tone for the quilt but also infused it with the spirit of the season.
The selection process involves more than just picking beautiful fabrics; it requires a thoughtful consideration of textures and how they’ll interact to create the quilt’s final look and feel.
Essentials for Your Rag Quilt
Gathering the right materials is crucial for your rag quilt project. Here’s a comprehensive list to ensure you have everything you need:
- Sewing Machine: A sturdy machine capable of handling multiple layers of fabric.
- Complimenting Fabrics: For the top layer, vibrant woven cotton prints work best, paired with soft, cozy flannel for the middle and back layers.
- Matching Thread: A high-quality thread, like Gutermann, will ensure your quilt’s durability.
- Cutting Tools: Sharp scissors or a rotary cutter and mat are essential for precise cuts.
- Sewing Pins: To keep your fabric layers aligned as you sew.
- Iron: A reliable iron to smooth out your fabric after washing and before cutting.
- Ragging Scissors: Specialized scissors that make snipping the frayed edges easier.
- Seam Ripper: Always handy to have for correcting any sewing mistakes.
- Optional: Quilting squares can help with measuring and cutting your fabric accurately.
Full Pattern: Click Here
Preparing to Quilt: A Patchwork Prelude
The initial steps of pre-washing your fabrics and ironing them are more than just preparatory tasks; they are integral to the success of your quilt. This process not only prevents future shrinkage but also ensures the colors remain true.
Cutting your fabrics into the desired sizes then allows you to lay out your quilt, giving you a visual of the completed project before you even start sewing.
Step-by-Step Instructions: Crafting Your Rag Quilt
Embarking on your rag quilt journey transforms the array of fabrics before you into a cozy masterpiece. Here’s how to bring your rag quilt to life, step by step:
- Cutting Your Fabric: Begin by cutting your fabrics into the desired sizes. For this project, you’ll need 9 1/2″ squares for the main blocks, 9 1/2″ x 5″ rectangles, and 5″ squares. These dimensions allow for a 1/2″ seam allowance, shrinking each block by 1″ in the final quilt.
- Creating Fabric Sandwiches: Each quilt block consists of three layers – a top, middle, and bottom. Place the backing fabric face down, add the middle layer, then top it with your chosen fabric face up. This layering ensures that each side of the quilt will display the charming, frayed edges characteristic of a rag quilt.
- Sewing the Blocks: Secure the layers of each block by sewing an “X” from corner to corner. This step not only holds the layers together but also adds a decorative element to the quilt.
- Assembling the Quilt: Lay out your blocks according to your planned design. Then, sew the blocks together, back sides facing each other, to keep the seam allowances on the top side of the quilt. This technique is what gives the rag quilt its distinctive, frayed seams.
- Joining the Rows: After sewing the blocks into rows, join these rows together. Pay attention to aligning the seams so that the quilt comes together evenly.
- Final Stitching Around the Quilt: Sew a 1/2″ seam around the entire perimeter of the quilt. This not only defines the edges but also ensures all layers are secured.
- Ragging the Edges: The most distinctive feature of a rag quilt comes from snipping the exposed seam allowances about 3/8″ – 1/2″ apart all around the quilt and at each seam intersection. Be careful not to cut through your stitches. Ragging scissors or a spring-loaded pair of snips can make this task easier and more comfortable.
Additional Tips for a Flawless Finish
- Consistent Snipping: Ensure your snips are evenly spaced to create a uniform frayed edge after washing.
- Fraying the Edges: Wash and dry your quilt several times to encourage the frayed edges to soften and puff up. This process enhances the quilt’s cozy, tactile appeal.
- Checking Your Work: After the initial wash, inspect your quilt for any seams that may have come undone during the ragging process and repair them as necessary.
The Joy of Completion
Completing your rag quilt marks the end of a creative journey and the beginning of countless moments of warmth and comfort. This project, simple in technique but rich in personal expression, results in a quilt that’s as unique as the hands that crafted it.
Whether draped over a couch, spread on a bed, or gifted to a loved one, your rag quilt is a testament to the love and care sewn into every stitch.
As you fold the finished quilt, feeling the soft, frayed edges and admiring the patterns you’ve brought together, take a moment to reflect on the journey. Each snip, seam, and stitch tells a story, your story, woven into a tapestry of fabric and thread destined to warm hearts and homes.