
Hey there, fellow quilting enthusiasts!
Let me take you back to a sunny afternoon when I decided to dive into the world of quilting.
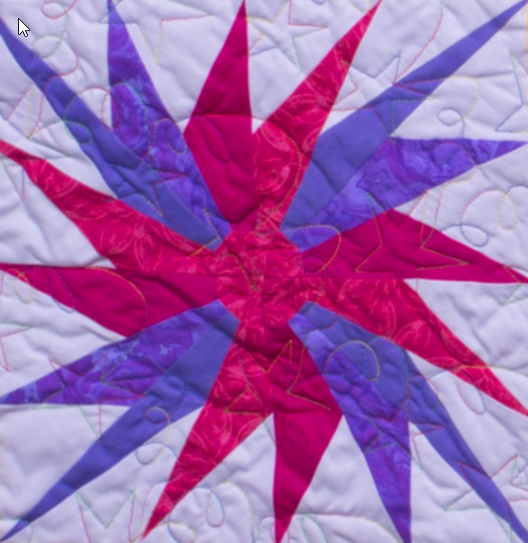
I had been scrolling through various patterns online, and nothing quite resonated with me until I stumbled upon the Milky Way Wall Hanging – Block 3.
It was vibrant, artistic, and it spoke to my inner creative goddess!
I knew I had to try it, especially with those gorgeous colors just calling my name.
As soon as I gathered my supplies, I was buzzing with excitement.
And trust me, it wasn’t long before I found myself completely immersed in this project.
With each fabric cut and stitch, I felt a sense of connection to the colorful quilt that was unfolding before me.
It turned into more than just a hobby; it became a profoundly satisfying experience that I knew I had to share with all of you.
Exploring the Intricate World of Paper Piecing
The Milky Way Wall Hanging – Block 3 utilizes paper piecing, a technique that adds precision and creativity to your quilt.
For those unfamiliar, it’s a method where you sew fabric pieces onto a paper foundation, guiding you to create complex designs with ease.
I love that it allows you to explore your fabric choices, combining them in unexpected ways when piecing each block.
This method can be incredibly rewarding, especially when you see the stunning results.
I often find paper piecing liberating since you can let your imagination run wild!
In creating the Milky Way Wall Hanging – Block 3, I felt empowered knowing I could showcase my personality through fabric selections and colors.
Diving into the Colors of the Milky Way
When it comes to the Milky Way Wall Hanging – Block 3, one of the standout features is undoubtedly its color palette.
With options like Lavender Sorbet and Hot Rose, you’re guaranteed to create a visual feast for the eyes!
Choosing the right combination not only makes the quilt vibrant but also adds depth and dimension to the overall design.
While working on my project, I found joy in pairing unexpected colors that I otherwise wouldn’t have considered.
Mixing and matching fabrics from different collections to create my personal variation of the Milky Way Wall Hanging – Block 3 turned out to be a breeze, and it was so much fun to see them take shape as I progressed.
What You’ll Need to Bring the Milky Way to Life
- Coats Dual Duty XP® Paper Piecing thread
- Lavender Sorbet – CSFSESS.SORBE
- Purple Marbled – CBFS005.SPLAS
- Violet Dahlia – CSFSESS.DAHLI
- Hot Rose – CBFS004.HOTRO
- Tropical Pink – CSFSESS.TROPI
- 4 copies each of Block 3 foundation sections A, B, and C (Page 3)
- Sewing Machine
- Basic Sewing Supplies
- Printer
Having all these materials on hand before you start is essential for a smooth crafting experience.
Gather your favorite scissors, pins, and a rotary cutter, as they will surely come in handy throughout the Milky Way Wall Hanging – Block 3 process.
Once you have everything ready, you’ll be all set to dive into this wonderful journey!
Preparation is key!
I recommend printing out the templates and having your fabric pre-cut as it will save you a lot of time later.
Knowing each piece will fit perfectly into its designated area gets you excited to see the overall block come together.
There’s something about the anticipation of piecing together the Milky Way Wall Hanging – Block 3 that brings a joyful thrill.
Ready, Set, Quilt!
Now that you’ve gathered all your materials, are you ready to tackle the step-by-step instructions?
Below, you’ll find everything you need to construct the Milky Way Wall Hanging – Block 3.
I’ve also got a link for the full pattern just beneath the image to help guide you along the way.
Full Pattern: Click Here
Additional Tips for Quilting Success
As you dive into each step of the Milky Way Wall Hanging – Block 3, don’t forget to take your time!
Paper piecing can be meticulous, so give yourself grace as you navigate through each piece.
If you make a mistake, don’t worry!
These moments are part of the learning process and often lead to creative solutions you may not have thought of otherwise.
When unpicking stitches or tearing away paper, be gentle.
You want to preserve the integrity of your fabric, especially since this quilt is a true labor of love.
Embrace the little challenges that pop up along the way to make your experience even more rewarding!
Quilting: A Blend of Art and Heart
The beauty of the Milky Way Wall Hanging – Block 3 doesn’t just lie in the vibrant colors and intricate design but also in the emotions imbued into every stitch.
This quilt is a reflection of your creativity and effort.
Each piece tells a story, and once completed, it serves as a symbol of your artistic journey!
If you’ve enjoyed working on this project or read about it, you must check out more articles on my blog!
There are tons of incredible pieces waiting for you, perfect for sparking your creativity.
I’ve got something super special lined up that you can discover by clicking here.
In conclusion, working on the Milky Way Wall Hanging – Block 3 has been an absolute joy ride from start to finish.
Your quilt will surely become a cherished addition to your home, a visual delight that showcases your unique style.
Happy quilting, my friends!