
Have you ever felt that exhilarating mix of excitement and trepidation when you’re about to embark on a new creative adventure?
That was precisely how I felt when I first laid my eyes on the Milky Way Wall Hanging pattern.
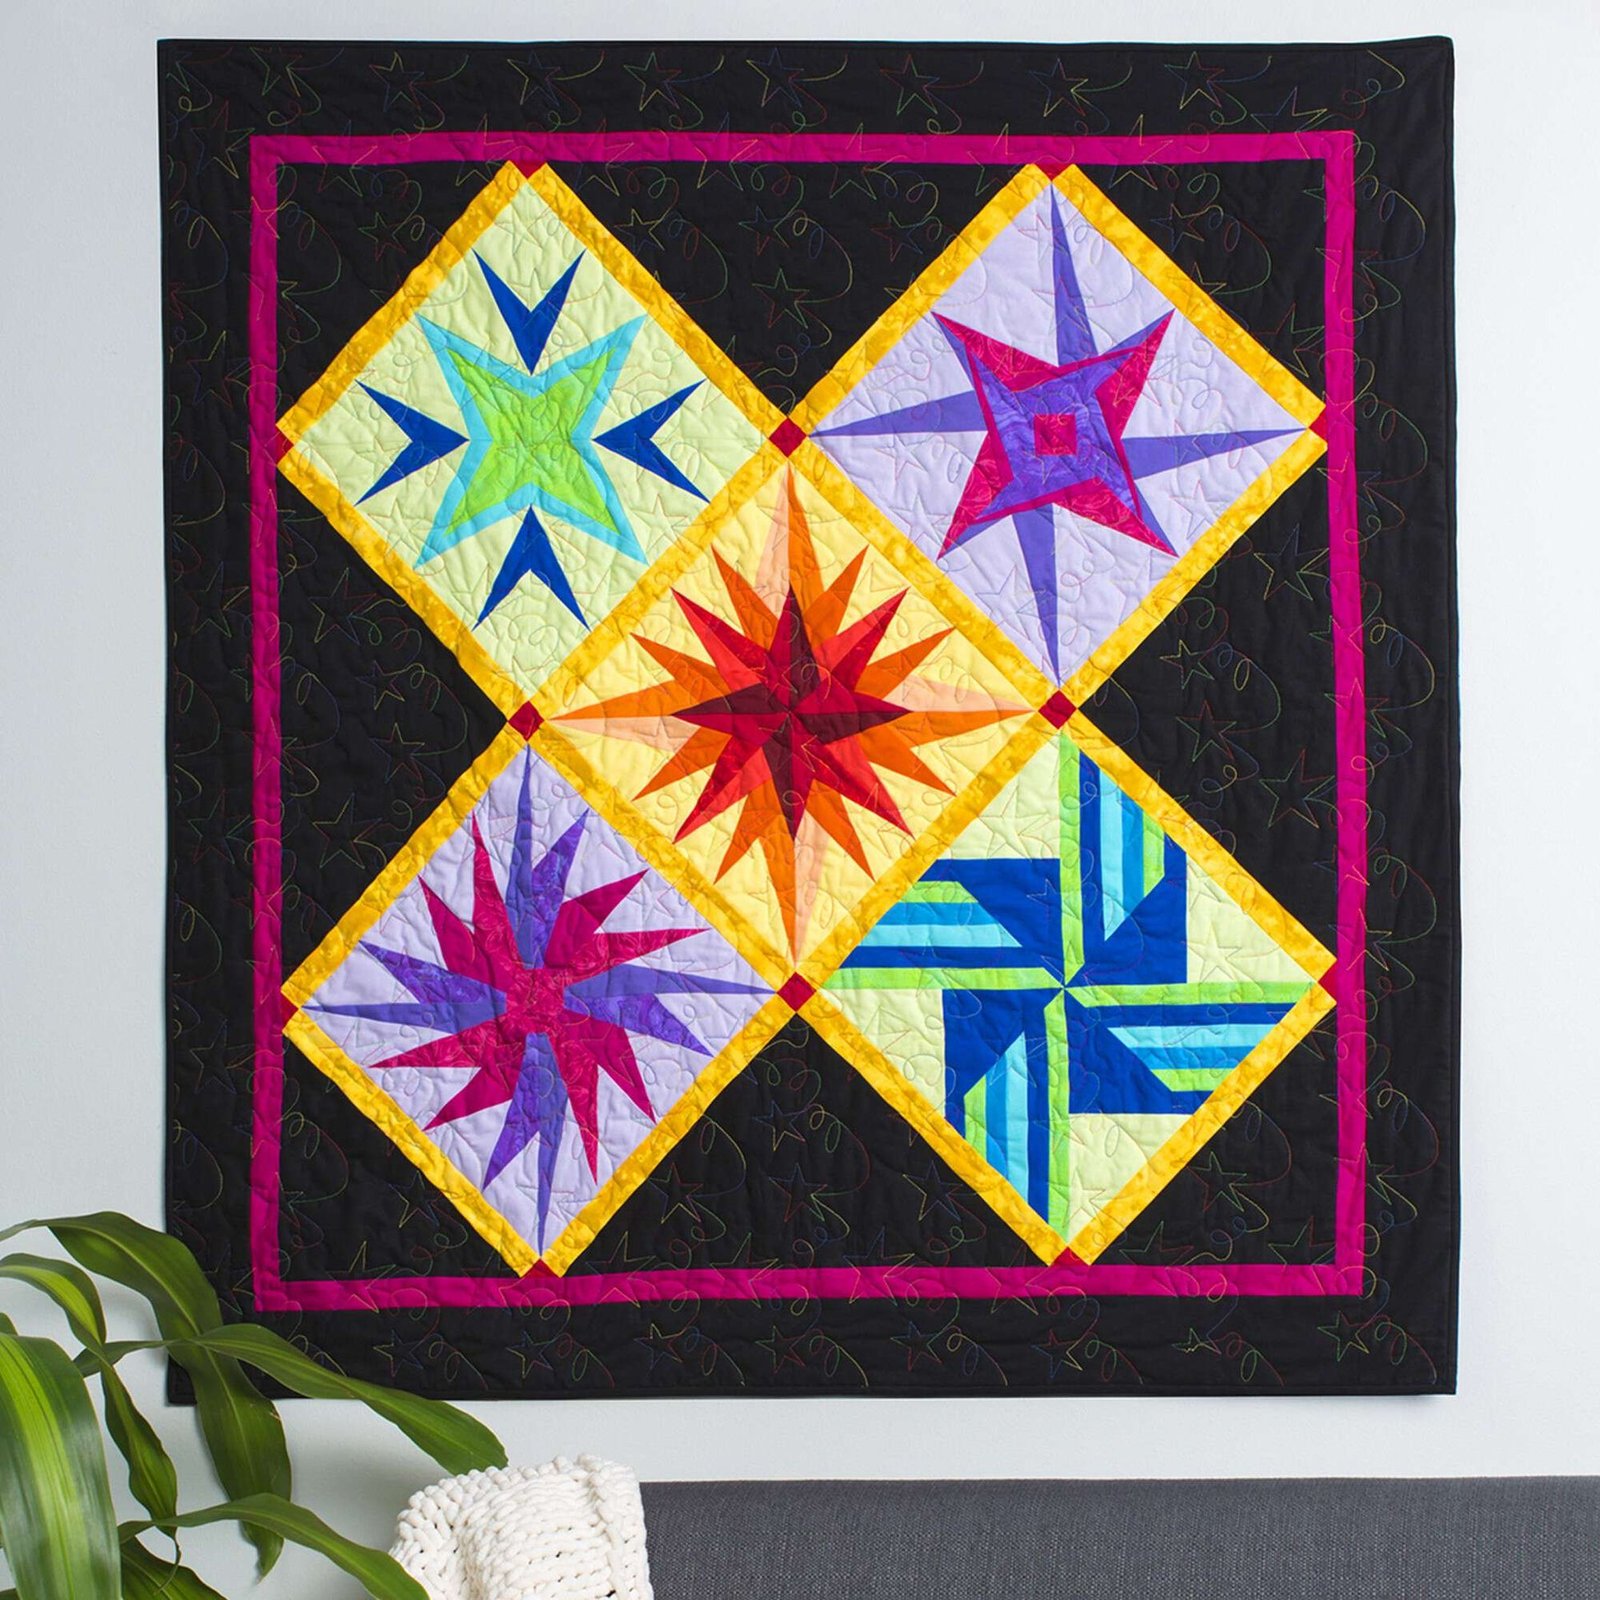
With its starry theme and vibrant colors, I imagined how this stunning piece would transform my living space into a starry haven.
As your friendly quilter Anna, I can assure you that there’s absolutely no regret in taking this cosmic journey!
Once I gathered my materials and prepped my space, I was ready to dive in.
The thrill of creating something unique is unlike anything else!
Each step in the process of making the Milky Way Wall Hanging adds to the anticipation of the finished product.
Let me take you through my cosmic crafting escapade—trust me, you’ll want to join in!
Bringing the Milky Way into Your Home
This gorgeous pattern is not just for aesthetics; it’s about storytelling, too!
The Milky Way Wall Hanging captures the beauty of our universe.
Through quilting, we create narratives, and this pattern is like a quilted love letter to the cosmos.
As I began piecing together the stars and colors, I realized how each square could represent dreams, aspirations, and even cherished memories.
Moreover, working on a project like this allows me to reflect on the importance of patience and precision.
Each cut, stitch, and color choice in the Milky Way Wall Hanging becomes a meditative practice.
It’s essential to remember that beautiful things often take time, and the journey is as rewarding as the final piece.
Textile Harmony: Color and Fabric Choices
The Milky Way Wall Hanging comes alive through the thoughtful selection of colors and textures.
You’ll need a diverse palette, from calming black triangles to vivid saffron sashing, which makes the piece truly pop!
Selecting Coats Cotton and FreeSpirit Designer Essential Solids for this project ensures that your quilting experience is not only enjoyable but also results in a stunning finish.
Incorporating various colors—like the whimsical Tropical Pink for the inner border—provides a visual rhythm that resonates with the beauty of a starlit sky.
Trust me; choosing the right fabrics can elevate the Milky Way Wall Hanging from beautiful to breathtaking!
Materials
- Black Cotton for setting triangles, outer border, and binding
- Saffron Cotton for sashing
- Radish Cotton for corner squares
- Royal Blue Marbled for backing
- Tropical Pink Cotton for inner border
- Batting
- Coats Dual Duty XP® Paper Piecing thread – neutral color
- Coats® Cotton Machine Quilting thread – color 813 Over the Rainbow, or your color of choice
Prepping for Launch: Get Ready to Quilt!
Preparation is crucial for a successful quilting experience.
Begin by cutting your fabric according to the Milky Way Wall Hanging specifications.
Accurate cutting is vital, so I recommend using a rotary cutter and mat.
This setup allows for clean edges and precise pieces, a necessity when crafting those star blocks.
It’s helpful to lay everything out in your sewing space, like a celestial map of stars aligning.
Arrange your pieces according to the color layout—this will make the sewing process much smoother and enable you to visualize the final product!
Step-by-Step Instructions:
Below, I’m sharing essential steps to bring the Milky Way Wall Hanging to life.
Each step is crucial in sewing, so be sure to follow along carefully.
You can find the complete pattern by following this link!
Full Pattern: Click Here
Additional Tips for Stellar Sewing
Don’t be afraid to take your time!
If you run into hiccups, feel free to unpick stitches.
It’s all part of the process!
Also, I suggest utilizing a design wall; it helps visualize how your pieces will connect and fit together.
If you can arrange them beforehand, it creates coherence in the Milky Way Wall Hanging and ensures everything flows seamlessly.
Lastly, remember to keep your seam allowances consistent!
A quarter-inch might seem trivial, but it can make a significant difference in achieving a well-fitted quilt.
Consistency is your best friend in this galactic endeavor!
Advanced Techniques to Enhance Your Piece
As you grow comfortable with your skills, consider exploring decorative stitches or quilting techniques to enhance your Milky Way Wall Hanging.
Using different stitching methods can highlight specific areas or create texture that mimics the depth of space.
For instance, gentle curves or swirls could echo a breeze amongst the stars.
Such techniques bring your quilt to life and transform it into a conversation starter!
Every aspect reflects your personality and creativity.
Celebrate Your Cosmic Creation!
Congratulations, fellow quilters!
By now, you’ve not only crafted a magnificent Milky Way Wall Hanging, but you’ve also merged creativity with storytelling.
This piece is not merely fabric; it’s a tapestry of your journey, reminding you of patience, color, and, most importantly, the joy of creating.
As you hang your beautiful Milky Way Wall Hanging, feel free to bop back over to the blog for even more amazing content and inspirations!
There’s really a treasure trove of creative ideas waiting, and I’ve prepared an incredible piece for you to explore by clicking here.
Let’s continue crafting and conquering the cosmos together!