
Quilting has always been more than just a hobby for me. I remember vividly the first time I tackled a complex pattern — it was a rainy afternoon, and I was sitting in my grandmother’s sewing room, the sound of the needle humming through the fabric almost meditative. She had always been my inspiration, and on that particular day, she handed me a quilt she had started but never finished. The Pacific Rim quilt, with its bold geometry and intricate shading, reminded me of that quilt — the same sense of challenge, beauty, and precision.
As I dove into creating my own version of the Pacific Rim Quilt, the process brought back those familiar feelings of both excitement and frustration. Each stitch became a step in mastering the technique, each fabric choice a reflection of my growing confidence. In this guide, I want to take you through the process, just as my grandmother guided me, helping you navigate the challenges and experience the joy of completing this stunning quilt.
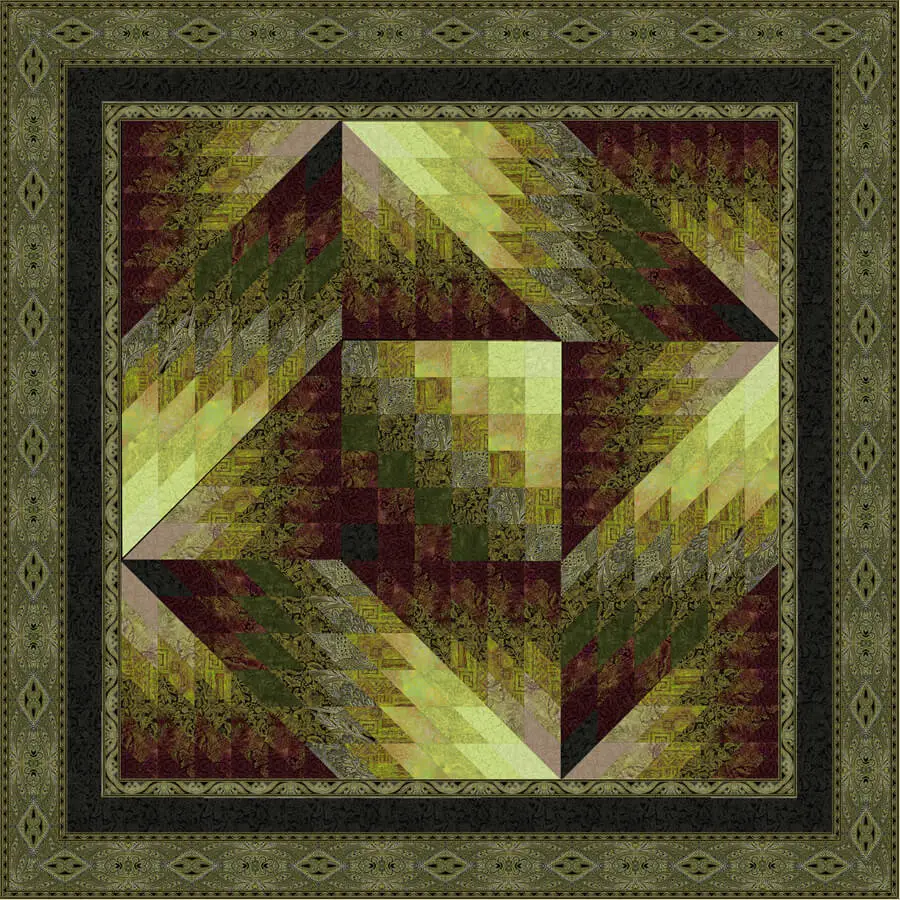
Pacific Rim Quilt Pattern: A Detailed Guide
The Pacific Rim Quilt stands out for its unique use of color shading, a signature technique by renowned designer Jinny Beyer. This quilt combines geometric shapes with advanced strip-piecing techniques, making it a stunning and bold contemporary design. For quilters looking to elevate their skills, the Pacific Rim quilt offers a challenging and rewarding experience, resulting in a breathtaking quilt with three-dimensional visual effects.
Finished Dimensions and Materials
- Finished Size: Approximately 60-3/4″ x 60-3/4″ (154 cm x 154 cm)
- Designer: Jinny Beyer, featuring a fabric collection created for RJR Fabrics
The Pacific Rim quilt pattern uses various shades of fabric, meticulously arranged to create a seamless gradient. Jinny Beyer’s design expertise is evident in the interplay between light and dark hues, giving the quilt its unique three-dimensional appearance.
Before starting, gather all your materials and tools:
- Fabric: The Pacific Rim quilt uses multiple fabrics from Jinny Beyer’s collection. Each fabric has a specific purpose, contributing to the overall harmony of the design.
- Rotary cutter and mat: Essential for precise cutting, especially when working with bias edges.
- Rulers: A straight ruler and a right-angle triangle ruler are necessary to measure and cut fabric strips and angles accurately.
- Other essential tools: Thread, pins, and a sewing machine fitted with a quarter-inch foot for precise seam allowances.
Quilt Construction Techniques
1. Strip-Piecing for Efficient Assembly
One of the main techniques employed in the Pacific Rim quilt is strip-piecing. Instead of cutting individual squares and sewing them together, strip-piecing involves sewing long strips of fabric side by side. These strips are then cut into smaller sections, speeding up the quilt assembly process while ensuring consistency in the dimensions of the units.
The Pacific Rim quilt begins with the creation of square units (labeled “A”) by sewing fabric squares into rows. These rows are then joined to create a large square that forms the central part of the quilt. Once the main square is complete, you’ll move on to assembling the strip sets (labeled “B” and “C”).
- B and C Strip Sets: The strip sets in the Pacific Rim quilt are staggered, with the “B” strips offset to the right and the “C” strips offset to the left. After assembling the strips, they are trimmed at a 45-degree angle. These angled cuts are crucial for achieving the quilt’s dynamic layout.
Full Pattern: Click Here
2. Managing Bias Edges
An important part of the Pacific Rim quilt pattern is dealing with bias edges, which are the diagonal cuts in the fabric. Bias edges have a natural stretch, so careful handling is necessary to prevent distortion during sewing. The diamond-shaped pieces in the Pacific Rim quilt are particularly prone to stretching due to their angled edges.
When sewing bias edges for the Pacific Rim quilt, it’s essential to handle the fabric with care to avoid pulling or stretching it out of shape. Use pins sparingly, and press rather than iron the seams to keep the edges intact.
3. Partial Seam Technique for Assembly
The partial seam technique is used to attach the rectangular units, made from the B and C strip sets, to the central square unit of the Pacific Rim quilt. This technique allows you to join pieces without having to deal with corners that don’t align perfectly.
- How to Do It: Begin by attaching the first rectangular unit to one side of the square unit in the Pacific Rim quilt. Stop sewing a few squares from the end of the rectangular unit, as indicated in the pattern. Press the seam. Attach the next rectangular unit, working counterclockwise around the central square. After attaching all the rectangular units, return to the first seam and finish sewing it.
This method not only simplifies the assembly process but also ensures that the Pacific Rim quilt pieces fit together perfectly.
4. Adding the Borders with Mitered Corners
Once the quilt top is assembled, it’s time to add the borders. Jinny Beyer’s Framing a Square with a Border Print Technique gives the Pacific Rim quilt a polished and professional finish by using mitered corners for the outer border.
- Step 1: Lay the border fabric strip across the center of the Pacific Rim quilt, aligning a design motif from the fabric border with the center of the quilt top. Mark the edges with a right-angle triangle to create the miter.
- Step 2: After marking the miters, cut the fabric and carefully align the border strip’s design along the quilt’s edges. Repeat this process for all four sides, ensuring that the design is consistent along the borders.
- Step 3: Pin the middle of the border strip to the center of each quilt edge in the Pacific Rim quilt, then pin the corners. Ease any excess fabric into the middle section, securing it with pins. Once all the edges are pinned, sew the borders to the quilt top, finishing with the mitered corners.
5. Quilting and Finishing
With the quilt top complete, it’s time to layer the quilt. Place the backing fabric right side down, followed by the batting, and finally the quilt top (right side up). Baste the layers together to secure them during quilting. You can quilt as desired, following the lines of the pattern or adding your own design to the Pacific Rim quilt.
Once quilting is complete, trim the backing and batting to match the edges of the Pacific Rim quilt top. Finish by binding the edges with fabric strips for a clean and durable finish.
Fabric Cutting Guidelines
To make the assembly process for the Pacific Rim quilt more manageable, it’s recommended to label each fabric with a small paper square indicating the number and cut letter. Below are the general guidelines for cutting the fabrics used in the Pacific Rim quilt:
For instance, Fabric 1 is cut into 3” squares and 2-1/4” wide strips. This process is repeated with variations for each fabric, ensuring that the colors blend smoothly into the quilt’s gradient.
Fabric 2, Fabric 3, and beyond follow similar guidelines, with a combination of 3” squares and 2-1/4” wide strips. Additionally, fabrics like Fabric 10 and Fabric 11 are also used for binding and trimming, adding a final touch to the edges of the Pacific Rim quilt.
Jinny Beyer’s meticulous fabric selection ensures a smooth gradient effect, with each fabric playing a specific role in the Pacific Rim quilt‘s visual flow.
Backing and Binding
For the backing, it’s suggested to use around four yards of a coordinating fabric. The backing fabric should complement the color palette used on the Pacific Rim quilt top without distracting from the design. Binding is typically done with fabric cut from the same collection, sewn around the edges of the Pacific Rim quilt to give it a polished finish.
Final Thoughts
The Pacific Rim Quilt is an exquisite project that combines traditional quilting techniques with modern design. Jinny Beyer’s use of color shading and intricate pattern work make the Pacific Rim quilt a true masterpiece. The pattern challenges quilters to master strip-piecing, bias edge sewing, and partial seam assembly, while the mitered borders provide a sophisticated finish. Upon completion, the Pacific Rim quilt will not only be a testament to your quilting skills but also a stunning piece of art that showcases the beauty of well-thought-out fabric selection and design.